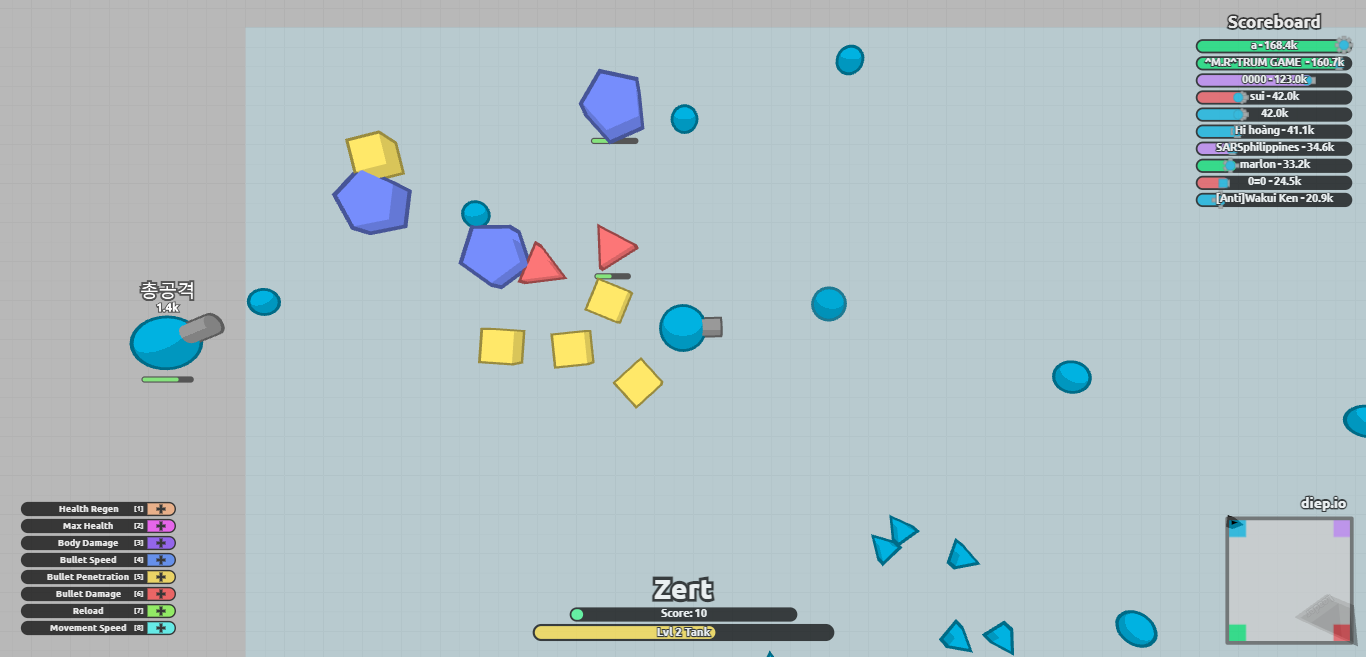
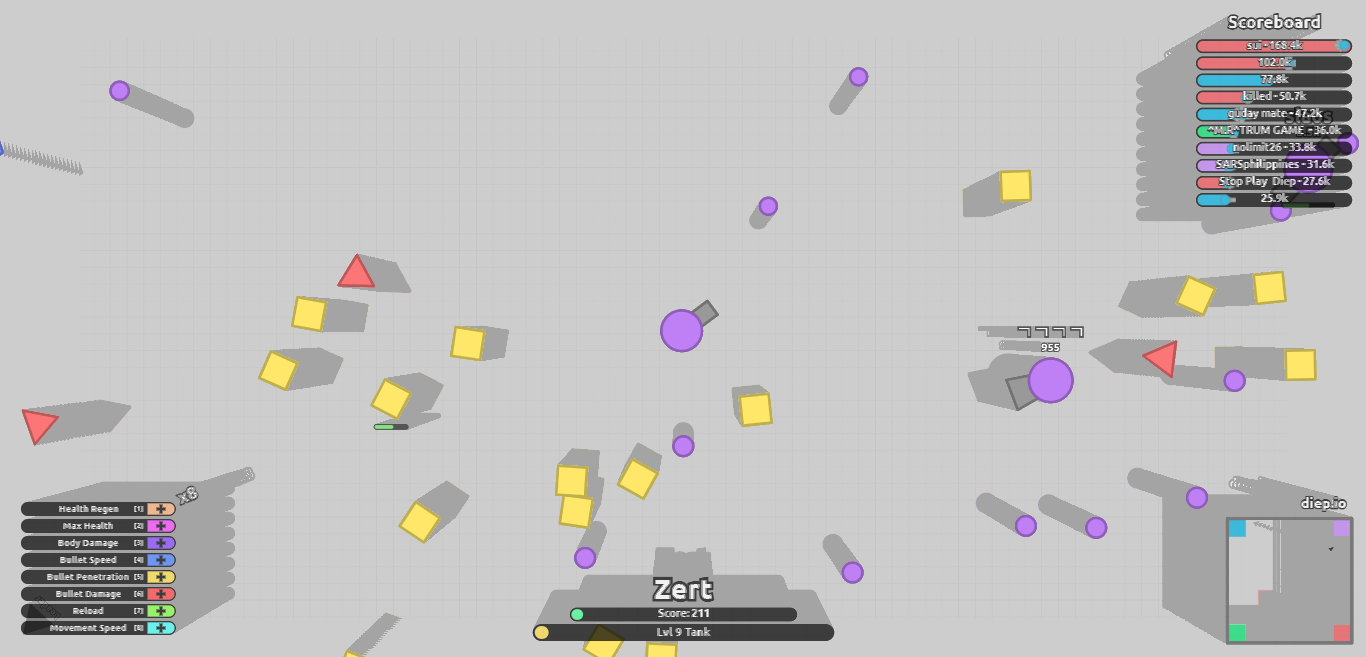
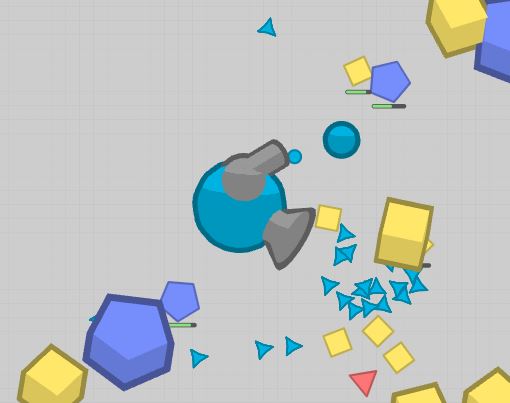
This is one of the coolest and prettiest mods I have ever made for a game. It turns diep.io into real 3D by putting 3D shapes at the locations of the 2D shapes. I say real 3D cos there have been mods for diep.io before that just gave a fake 3D effect by overlaying multiple scaled-down versions of the 2D rendered stuff. I made one too before making this. Below is a screenshot of it. The download links for both the scripts are also below if you want to try them out. (Don’t run both of them together!)
All the 3D stuff is rendered using Three.js. Instancing is also used to keep frame rates high. This article will be split into 3 parts. The first part will be about setting up all the three.js stuff needed for maximum performance. The second part will cover data extraction from draw calls and the third will cover some miscellaneous stuff. I couldn’t find a better title than that. Let’s get started!
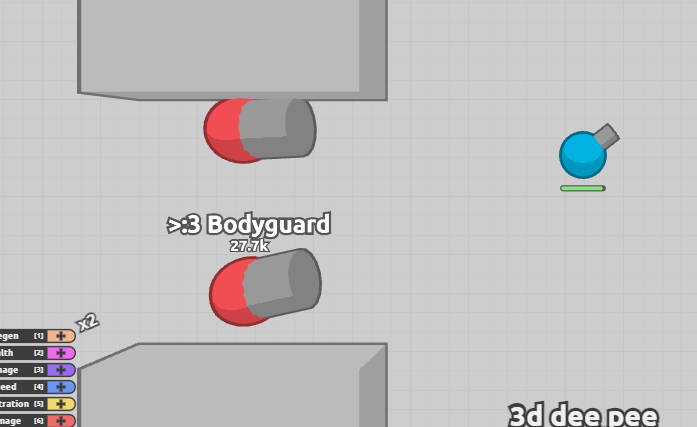
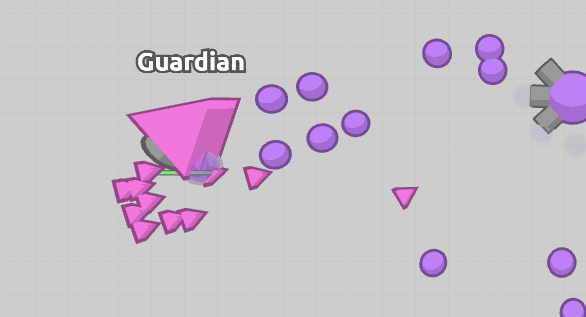
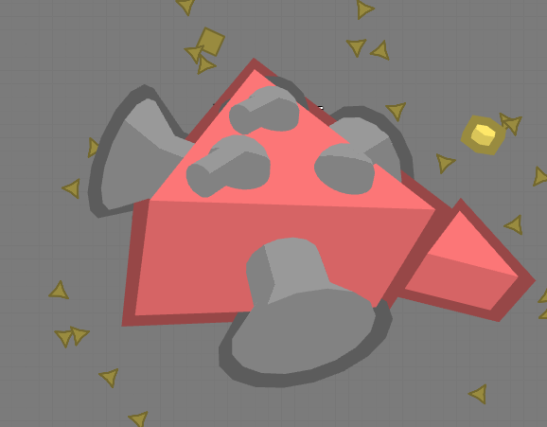
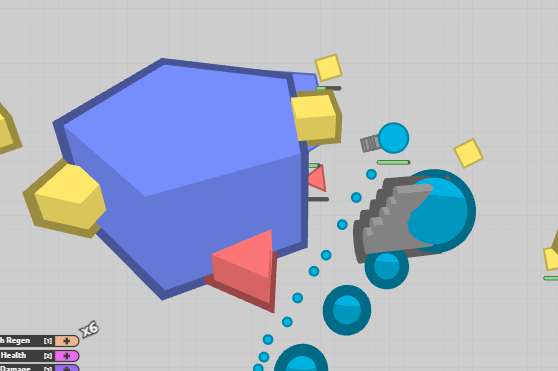
Table of Contents
1. Setting up
1.1 Creating instances
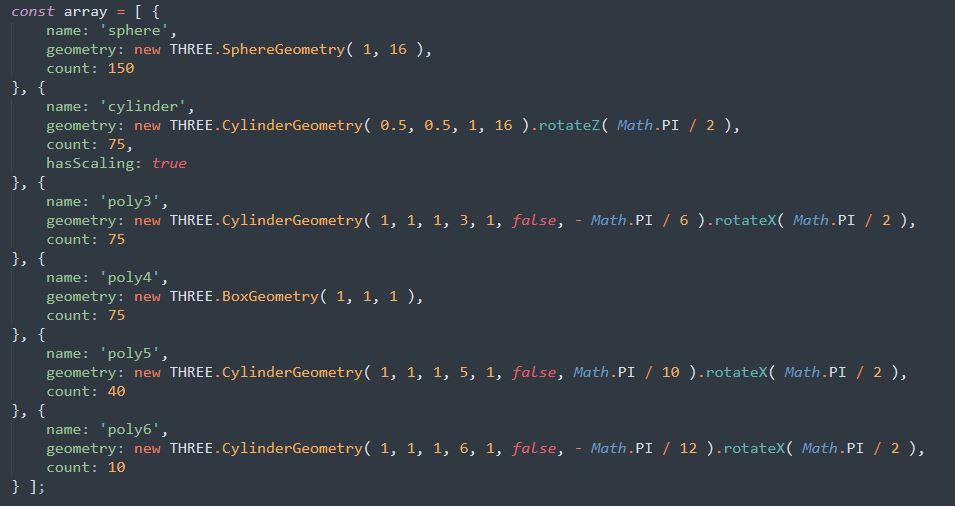
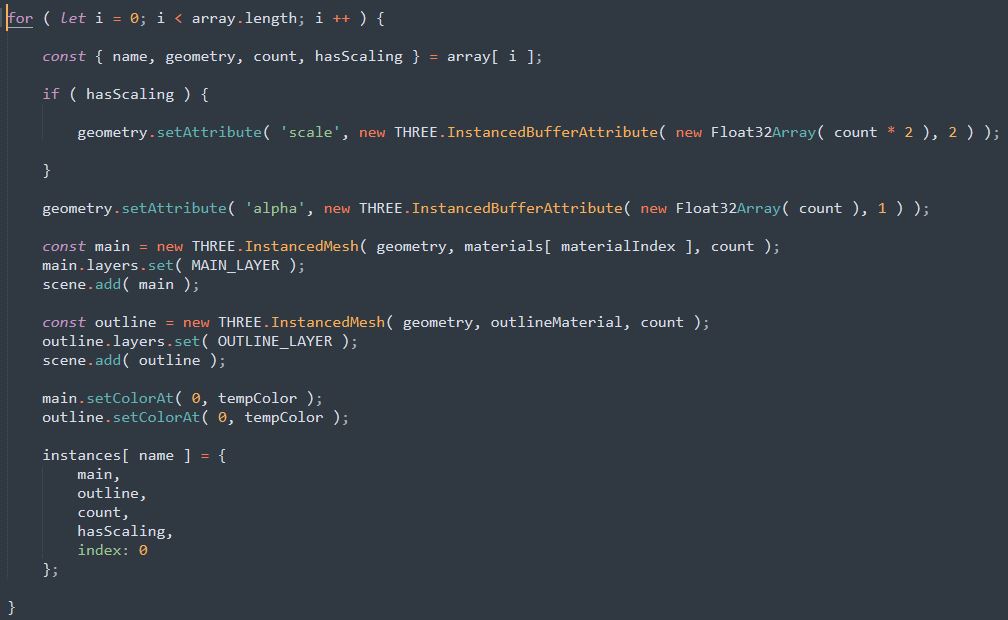
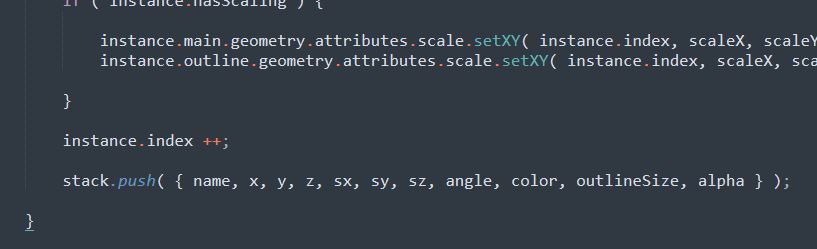
I won’t be going over the basics of Three.js. There are many resources for that on the internet. The code below defines all the instances we will be using. Only the hasScaling property needs explanation here. Others are self-explanatory. hasScaling is true if the ends of a shape need to be scaled. This is a performance thing for turrets. Instead of creating a new geometry for each rhombus-shaped turret, we can just scale the vertices in the shader.
The code below creates two InstancedMesh‘s using the array we had above. One for the main shape and the other for its outline. Two custom attributes, alpha, and scale (if hasScaling is true) are also attached to the geometry. scale is a vec2 and defines the scales of both the ends of a shape. An index property is also attached to the final instance object that is used while serializing data in the buffer attributes.
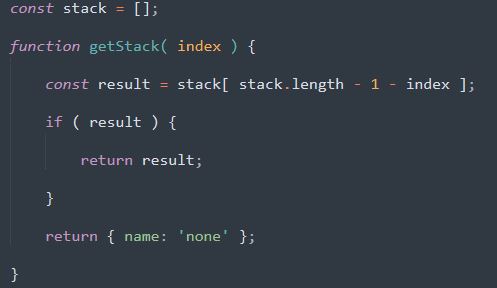
1.2 The getStack() function
This is a really important function. It lets us distinguish between different tanks/bosses in the game and fix the z-ordering of the shapes. How? It gets us the last added n-th 3D shape and by reading a bunch of them you can identify which tank or boss the game has recently rendered. You can then determine which object needs to be pushed over some other and then edit its matrix to fix its z-position.
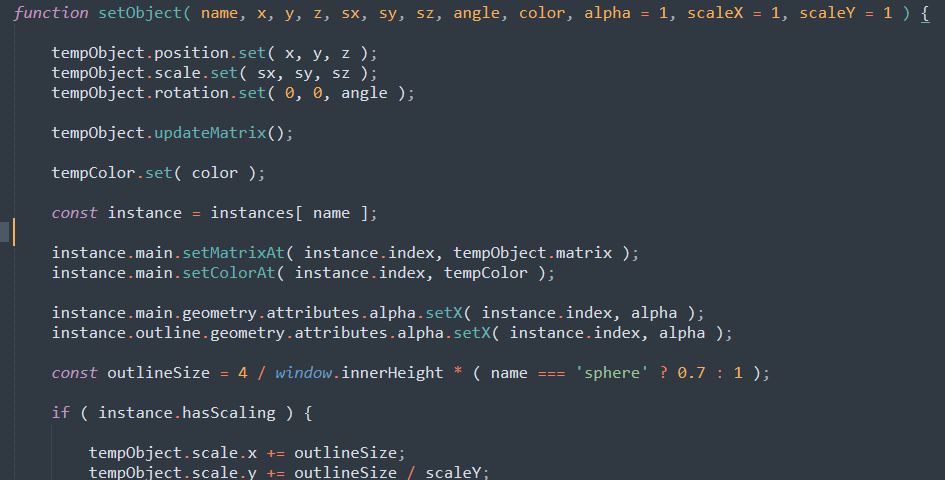
1.3 The setObject() function
Another really important function. It computes the matrix for a 3D object using the provided transformation data and sets it in the instance identified by the provided name. It also sets the color, end-scalings, and the alpha of the object and finally pushes the added object in the stack. The function is too long to come in a single screenshot so I will just post the start and end of the function here.
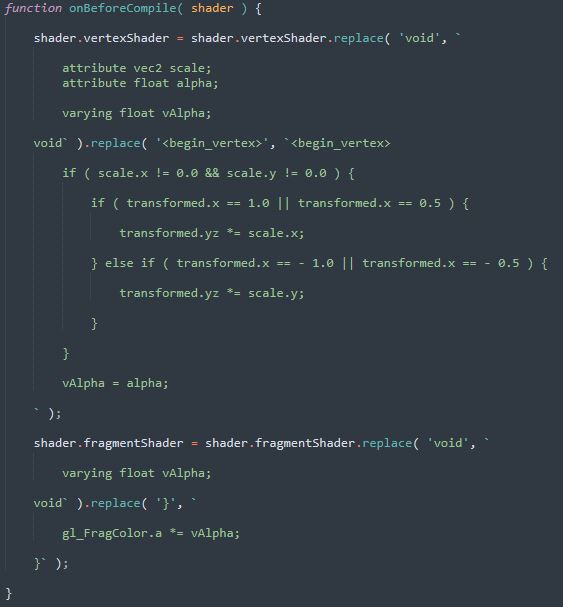
1.4 Modifying shaders
All the materials have this function set as their onBeforeCompile to modify its shader to support end-scaling and alpha.
1.5 Cleaning
Before rendering a frame, the stack and the buffer attributes of all the instances are cleared. This is achieved by proxying requestAnimationFrame and then proxying the callback passed to it.

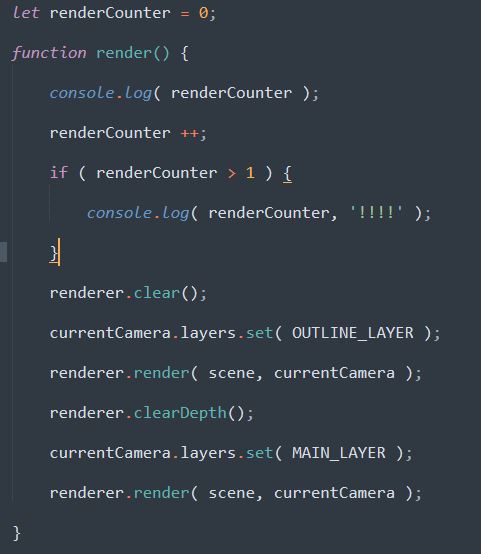
1.6 Rendering
The outlines are rendered first and then the main shapes are rendered after clearing the depth buffer. Why do we clear the depth buffer? To prevent the outline from getting over the shapes. Below is the render() function that does all of that. renderCounter is for debugging, ignore it.
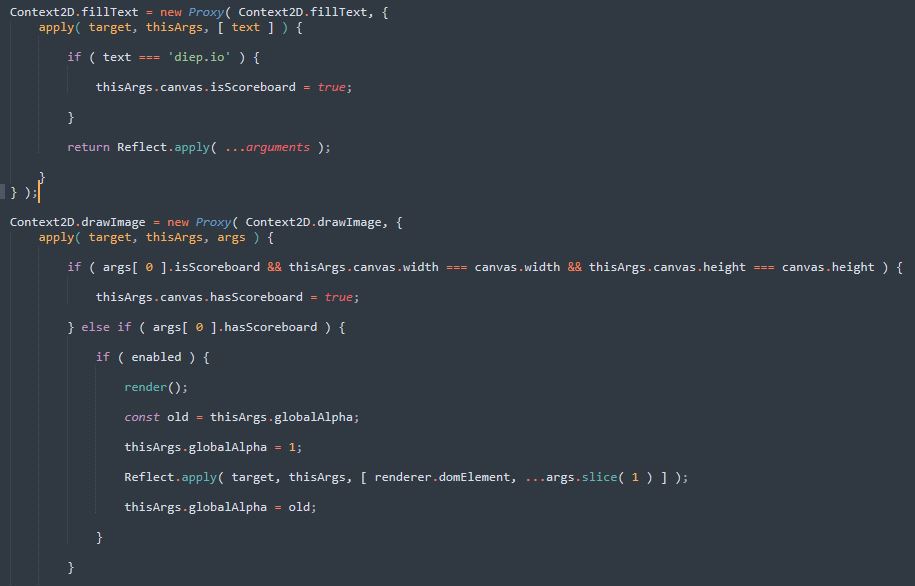
How do we place our rendered 3D scene in the game? One way is to just put our canvas over the game’s canvas with pointer-events set to none. But the 3D objects will be over the UI so it isn’t that good. What other option do we have? Rendering our canvas onto the game’s canvas before the leaderboard is rendered. Below’s the code for that.
2. Extracting data
Replacing 2D shapes with 3D shapes seems easy enough. So what’s the real deal here? Diep.IO’s source code is compiled down to WASM. You can’t find some triangle, square, or any other shape list here. My script gets all the data from draw calls. The game also doesn’t reveal anything useful in the parameters of the draw call function. For example, a call to ctx.arc() will look like ctx.arc(0, 0, 1, startAngle, endAngle). It uses matrices and ctx.setTransform() to set all the needed transformations before calling a draw function. You have to extract all the transformations from these matrices. Below is a 2D transformation matrix.
sx and sy are the scales, psi is the rotation, tx and ty are the positions. You can get the current matrix using ctx.getTransform() and then extract these data from it. X and Y positions of all the 3D objects will be between [-aspect, aspect] and [-0.5, -0.5] respectively. The camera’s z-position is sin(fov).
2.1 Circles
The game draws 3 arcs while drawing a circular game object. arcCounter is used prevent to multiple spheres from being added to the scene. While drawing the second arc the game reveals the correct color of the circle. We use it to update the color of the last added sphere. A big chunk of code for doing z-ordering and handling transparent shapes is hidden here. It will be explained later on in the third part of this post.

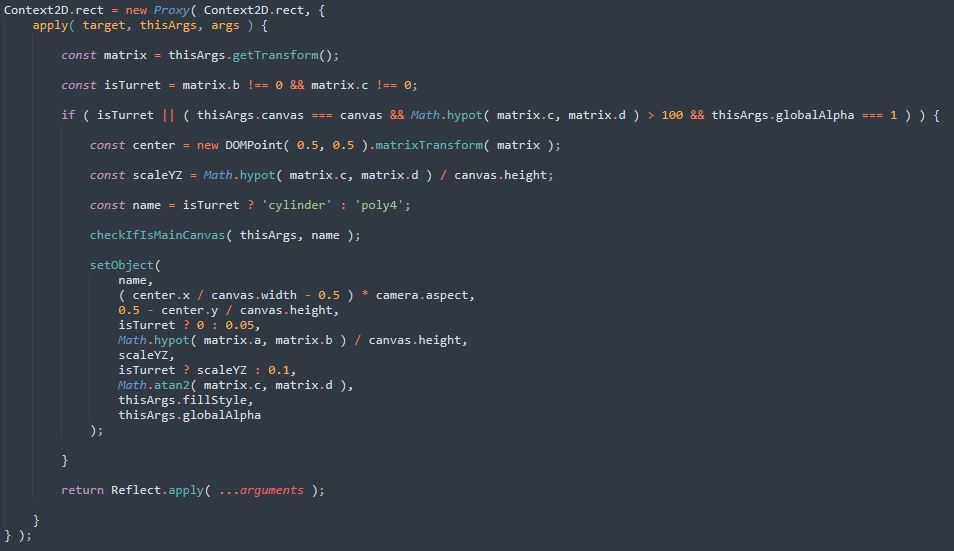
2.2 Rectangular turrets
These are rendered using rect(). The same function is also used for rendering some rectangles in the UI so we need to have a way to distinguish between them. I do it by checking if there’s any rotation present in the matrix. Turrets most of the time have some rotation.
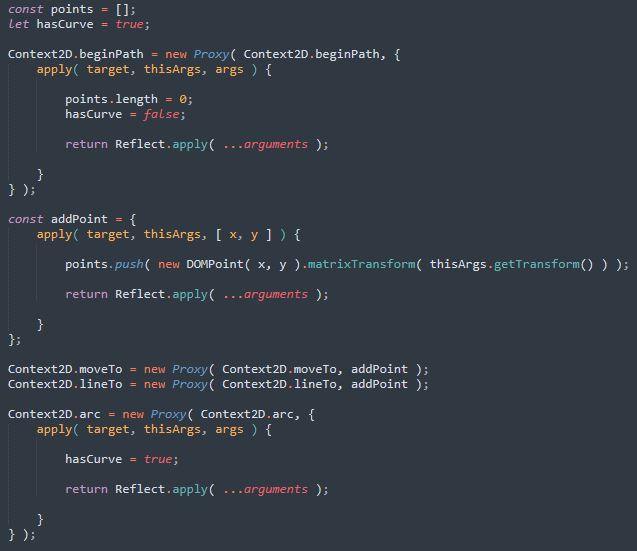
2.3 Squares, triangles, pentagons, and rhombus-shaped turrets
These are drawn with beginPath(), moveTo, lineTo, and fill(). The script proxies the second last two functions to push the screen-space points in a temporary array. This array is cleared when the first function is called. The script tries to identify the shape that the game could’ve rendered in the last function. How? By checking the number of points. Rhombus-shaped turrets are identified by comparing the side lengths. These functions are also used while rendering the game’s UI. UI elements are filtered out by checking if the drawn path has any curves (hasCurve).
Here’s a summary of what happens in the fill() function. It first checks if the points form a valid supported polygon. Then it computes its center. Traps are weirdly rendered in the game so it just checks for them and discards them. 4-point polygons are checked to see if they are turrets. Angle for a turret is the angle between the mid-points of the two parallel sides. Angle for the other shapes is the angle between the center of the shape and a vertex. The function is too big to come in a single screenshot. You can view it in the source code of the script if you wanna see it.
3 Miscellaneous stuff
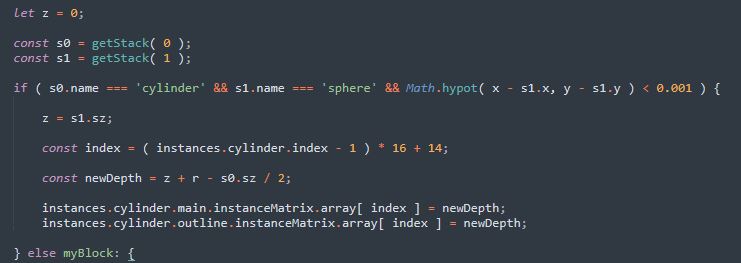
3.1 Fixing z-ordering
Now it’s time to go back to the arc()‘s proxy and look at the code that does all the z-ordering stuff. What components need proper z-ordering?
- The auto-turrets need to be placed over the tank’s body. (Click here to see a tank with auto-turret)
- The turrets of the streamliner need to be placed over each other.
- The defender‘s auto-turrets need to be placed over its body.
The first one is simply done by checking if a cylinder (turret) and a sphere (tank body) were added to the stack before drawing a circle (auto-turret’s body).
The second one is fixed by checking if we have added 5 cylinders (turrets) with the same angles before drawing a circle (the tank body).
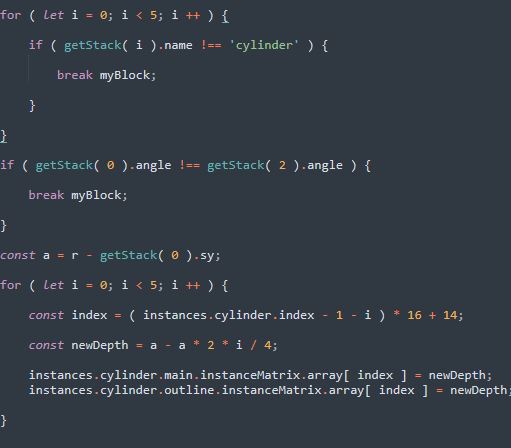
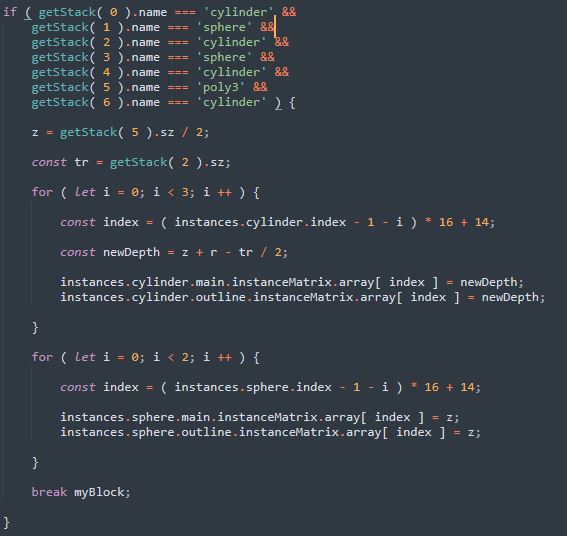
The stack-read-order for the last one is quite big so I will just post the code here. It fixes the depths before drawing the body of the last auto-turret.
3.2 Transparent tanks
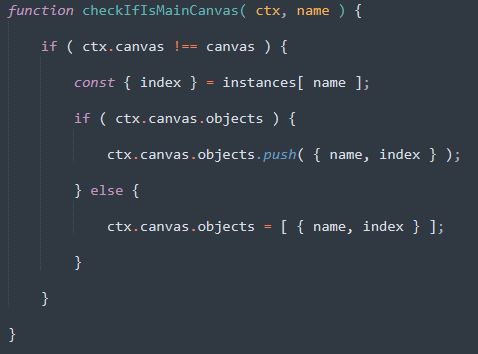
The game renders transparent tanks in a separate canvas without any alpha applied and then renders that canvas onto the main game canvas with alpha applied. Why? To prevent an artifact caused by transparent outlines. The part where the outline overlaps with the shape is darker. Not a good-looking glitch. How do we position these objects in our 3D scene? We can update the matrix of the instances in the drawImage() call. The function below is always called before calling setObject(). It stores the object in an array attached to the canvas if the canvas we are rendering on is not the main game canvas.
The code that updates the matrices of the instances has too many calculations going on in it. I won’t be explaining it in much detail. It just updates the position and scale of the objects and recomputes the outline’s size to prevent the outline from appearing scaled. Outlines are always uniform-sized.
That is all there is to this script. Thanks for reading! Keep scripting!
The pictures are pretty, I like soft, pastel colors. And also outline effect.
so cool lol
Cool
i love the game you did a good job on the game keep it up
cool
coooooooooooooooool
Yes good!
thank you appreciate it
great
cool story bro
lovely
i like it every people should play it if not then its fine.
nice
cool
is work
nice
cool bro
nice
cool
amazing work. works perfectly. i love it
COOL
its awsome
THIS IS DOPE
a nice hack
nice
its good
OMGGGGGG!!!! THE AIMBOT AND ESP IS AMAZING!!!!! THANK YOU SO MUCH!!!!!! ITS REALLY WORTH IT!
Can you make a spin bot for surviv io
hiiiiiiiiiiiiii this is amazing
nice
nice
nice work
very good mod
aimbot is really good
not tried it yet but it might be good
aimbot is really good
aim good
very good